In this post I’m going to demonstrate how to install Exchange 2010 SP1 and how to configure it to receive and send emails to the external world.
First step is to click HERE and install all prerequisites.
Now let’s start the installation.
Run the Exchange setup, click on Step3: Choose Exchange language option and click on Install only languages from the DVD.

Click on Step 4: Install Microsoft Exchange.

Click on Next.

Accept the license agreement and click on Next.

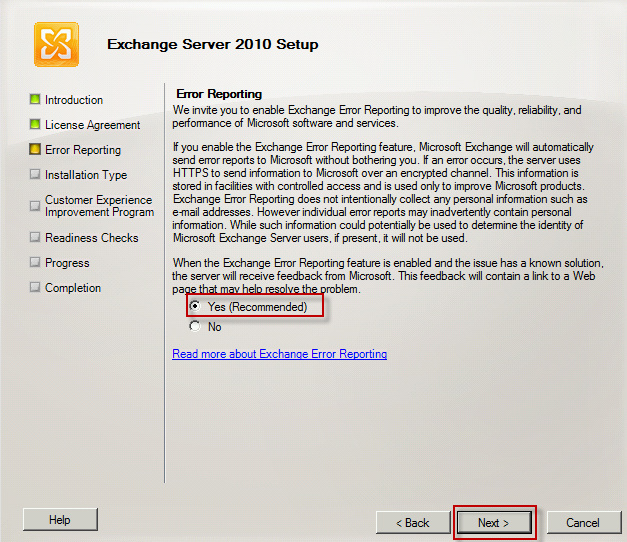
Select whether you want to enable the Error Reporting feature. Click on Next.
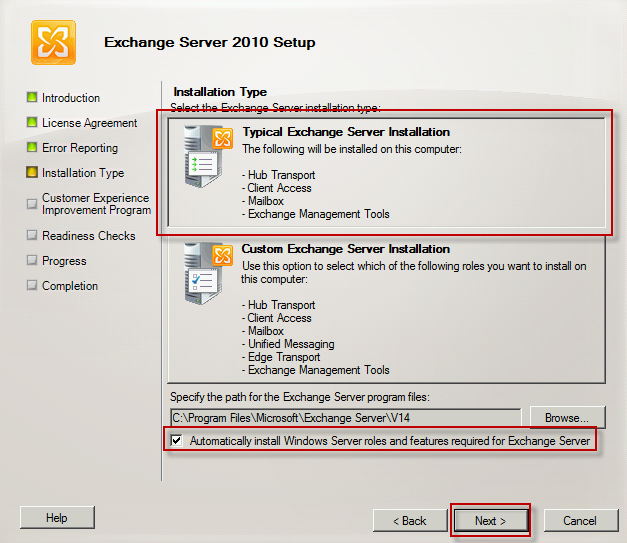
Select the type of install you want to perform. In our case we are going to perform the Typical Exchange Server Install which will install the Hub Transport, Client Access, Mailbox and Exchange Management Tools. Make sure you also select Automatically install Windows Server roles and features required for Exchange Server. Click on Next.
Specify the name of your organization. If different people manage AD and Exchange then select Apply Active Directory split permissions security model to the Exchange organization, otherwise leave it unticked. Click on Next.

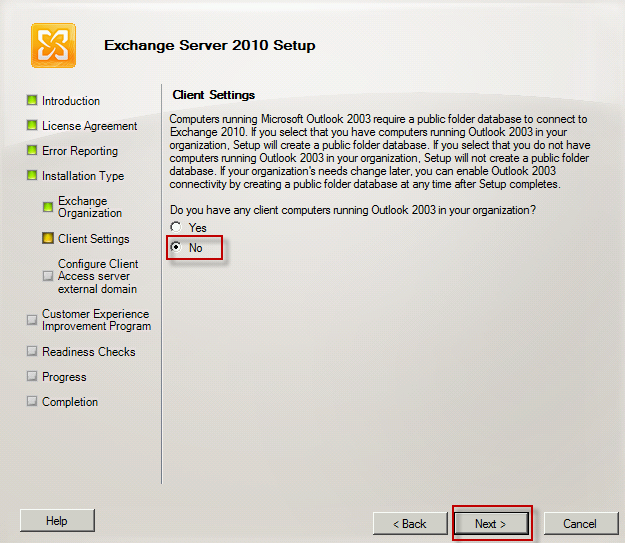
If you have computers running Outlook 2003 select Yes otherwise select No. Click on Next.
Now specify the domain name that external clients will use to connect to Exchange. Click on Next.

Select whether or not you want to join the Customer Experience Improvement Program. Click on Next.

Make sure the user you are performing the installation is member of the Schema Admins and Enterprise Admins groups otherwise you will receive the message below.
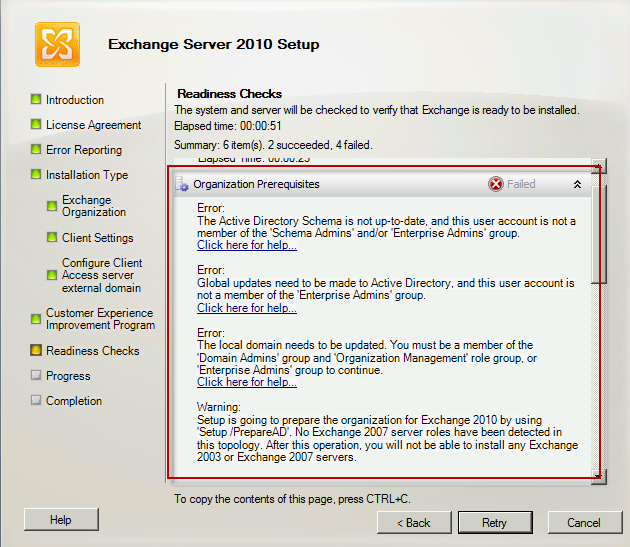
Note that Exchange setup will automatically make all required changes to AD.
e.g. extend AD schema
Click on Next.

If everything worked as expected you should see a screen like the one below. Select Finalize the installation using the Exchange Management Console. Click on Finish.

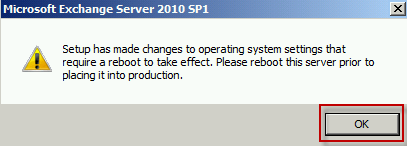
Once the installation is finished you will receive a message to restart the server. You can do it now or do it later. Just make sure you do it before placing it into production.
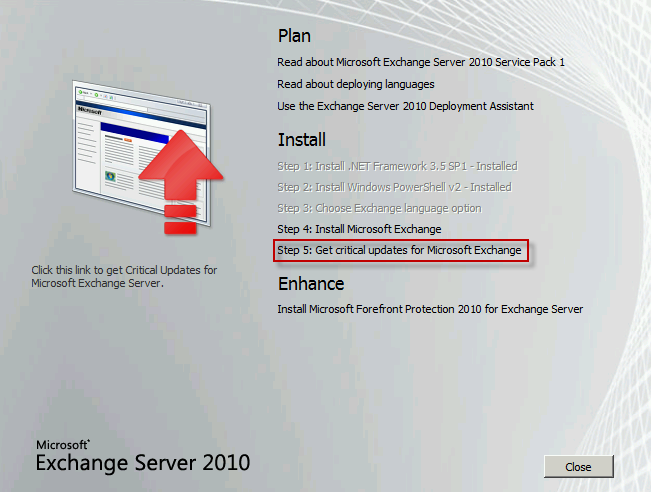
Install all updates available.
Now let’s configure it to receive and send emails to the internet. In the Exchange Management Console, expand Microsoft Exchange On-Premises, expand Organization Configuration and select Hub Transport. In the Actions pane click on New Send Connector.

Give it a name and select Internet as the Send connector. Click on Next.

Click on Add and type * in the Address space field. Click on OK. Click on Next.

Select Use domain name system (DNS) “MX” records to route mail automatically and tick Use the External DNS Lookup settings on the transport server. Click on Next.

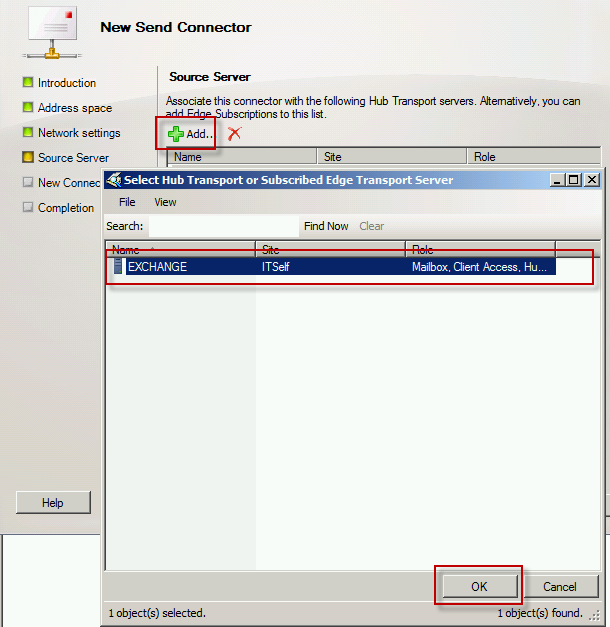
Click on Add. Select your Exchange server. Click on OK. Click on Next.
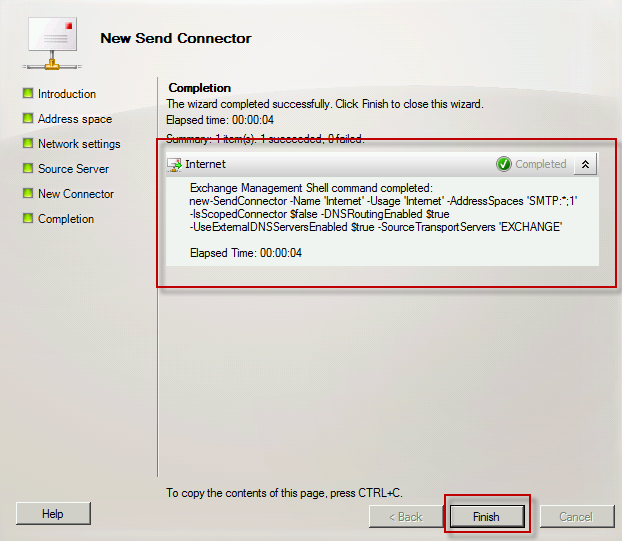
Click on New.

Click on Finish.
In the Server Configuration Node select Default SERVERNAME and click on Properties.

In the Permission Groups tab make sure you select Anonymous users, Exchange users, Exchange servers and Legacy Exchange Server. Click on OK.

Now that the Exchange configuration is completed go to your DNS server and make sure you have an A record with the name you specified earlier during the Exchange installation and your external clients will use to connect to your Exchange server. Make sure you also have a Reverse Lookup Zone configured.

In your provider hosting your public DNS records make sure you have an MX record with the same name you have just specified in your internal DNS for external clients.

